JavaScript/jQuery Diagram - Customize the Diagram Component
This article contains code samples that demonstrate how to customize the Diagram UI component and its items.
Change the Component's Background Color
Override the following CSS rule to change the Diagram component's background color:
jQuery
#diagram .dxdi-canvas .grid {
    fill: lightGray !important;
}
Angular
::ng-deep #diagram .dxdi-canvas .grid {
    fill: lightGray !important;
}
Vue
<style scoped>
    #diagram .dxdi-canvas .grid {
        fill: lightGray !important;
    }
</style>
React
#diagram .dxdi-canvas .grid {
    fill: lightGray !important;
}
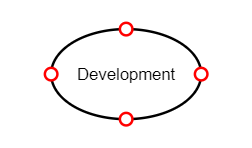
Change the Color of Connector Points
Add the following CSS rules to change the color of connector points:
jQuery
.dx-diagram .dxdi-control .dxdi-canvas .connection-point:not(.selector) {
    stroke: red;
}
.dx-diagram .dxdi-control .dxdi-canvas .connection-point:not(.selector).active {
    fill: red;
}
Angular
::ng-deep .dx-diagram .dxdi-control .dxdi-canvas .connection-point:not(.selector) {
    stroke: red;
}
::ng-deep .dx-diagram .dxdi-control .dxdi-canvas .connection-point:not(.selector).active {
    fill: red;
}
Vue
<style scoped>
    .dx-diagram .dxdi-control .dxdi-canvas .connection-point:not(.selector) {
        stroke: red;
    }
    .dx-diagram .dxdi-control .dxdi-canvas .connection-point:not(.selector).active {
        fill: red;
    }
</style>
React
.dx-diagram .dxdi-control .dxdi-canvas .connection-point:not(.selector) {
    stroke: red;
}
.dx-diagram .dxdi-control .dxdi-canvas .connection-point:not(.selector).active {
    fill: red;
}
Customize the Context Menu's Items
The example below demonstrates how to show default and custom commands in the context menu depending on the selected item:
jQuery
$(function () {
    var diagram = $("#diagram").dxDiagram({
        onSelectionChanged: function(e) {
            // Displays the "showGrid" and "snapToGrid" commands when a user selects no items
            if (e.items.length === 0)
                e.component.option("contextMenu.commands", ["showGrid", "snapToGrid"]);
            else
                // Displays the "fontName", "fontSize", and "selectShapes" commands when a user selects a shape
                if (e.items[0].itemType === "shape")
                    e.component.option("contextMenu.commands", ["fontName", "fontSize", {name: "selectShapes", text: "Select All Shapes"}]);
                // Displays the "connectorLineStart", "connectorLineEnd", and "selectConnectors" commands when a user selects a connector
                else
                    e.component.option("contextMenu.commands", ["connectorLineStart", "connectorLineEnd", {name: "selectConnectors", text: "Select All Connectors"}]);
        },
        onCustomCommand: function(e) {
            if (e.name == "selectShapes") {
                var shapes = e.component.getItems().filter(function(item) {
                    return (item.itemType === "shape")
                });
                e.component.setSelectedItems(shapes);
            }
            if (e.name == "selectConnectors") {
                var connectors = e.component.getItems().filter(function(item) {
                    return (item.itemType === "connector")
                });
                e.component.setSelectedItems(connectors);
            }
        },
    }).dxDiagram("instance");
});
Angular
<dx-diagram #diagram id="diagram" (onSelectionChanged)="selectionChanged($event)" (onCustomCommand)="customCommand($event)">
</dx-diagram>
import { Component, ViewChild} from '@angular/core';
import { DxDiagramModule, DxDiagramComponent } from 'devextreme-angular';

@Component({
    selector: 'app-root',
    templateUrl: './app.component.html',
    styleUrls: ['./app.component.css']
})

export class AppComponent {
    @ViewChild(DxDiagramComponent, { static: false }) diagram: DxDiagramComponent;
    selectionChanged(e) {
        // Displays the "showGrid" and "snapToGrid" commands if a user selects no items
        if (e.items.length === 0)
                e.component.option("contextMenu.commands", ["showGrid", "snapToGrid"]);
        else
            // Displays the "fontName", "fontSize", and "selectShapes" commands when a user selects a shape
            if (e.items[0].itemType === "shape")
                e.component.option("contextMenu.commands", ["fontName", "fontSize", {name: "selectShapes", text: "Select All Shapes"}]);
            else
                // Displays the "connectorLineStart", "connectorLineEnd", and "selectConnectors" commands when a user selects a connector
                e.component.option("contextMenu.commands", ["connectorLineStart", "connectorLineEnd", {name: "selectConnectors", text: "Select All Connectors"}]);
    }
    customCommand(e) {
        if (e.name == "selectShapes") {
            var shapes = e.component.getItems().filter(function(item) {
                return (item.itemType === "shape")
            });
            e.component.setSelectedItems(shapes);
        }
        if (e.name == "selectConnectors") {
            var connectors = e.component.getItems().filter(function(item) {
                return (item.itemType === "connector")
            });
            e.component.setSelectedItems(connectors);
        }
    }
}
Vue
<template>
    <DxDiagram
        id="diagram"
        ref="diagram"
        @selection-changed="onSelectionChanged"
        @custom-command="onCustomCommand">
    </DxDiagram>
</template>
<script>
    import DxDiagram from 'devextreme-vue/diagram';
    export default {
        components: {
            DxDiagram
        },
        methods: {
            onSelectionChanged(e) {
                // Displays the "showGrid" and "snapToGrid" commands if a user selects no items
                if (e.items.length === 0)
                    e.component.option("contextMenu.commands", ["showGrid", "snapToGrid"]);
                else
                    // Displays the "fontName", "fontSize", and "selectShapes" commands when a user selects a shape
                    if (e.items[0].itemType === "shape")
                        e.component.option("contextMenu.commands", ["fontName", "fontSize", {name: "selectShapes", text: "Select All Shapes"}]);
                    else
                        // Displays the "connectorLineStart", "connectorLineEnd", and "selectConnectors" commands when a user selects a connector
                        e.component.option("contextMenu.commands", ["connectorLineStart", "connectorLineEnd", {name: "selectConnectors", text: "Select All Connectors"}]);
            },
            onCustomCommand(e) {
                if (e.name == "selectShapes") {
                    var shapes = e.component.getItems().filter(function(item) {
                        return (item.itemType === "shape")
                    });
                    e.component.setSelectedItems(shapes);
                }
                if (e.name == "selectConnectors") {
                    var connectors = e.component.getItems().filter(function(item) {
                        return (item.itemType === "connector")
                    });
                    e.component.setSelectedItems(connectors);
                }
            },
    };
</script>
React
import React from 'react';
import Diagram from 'devextreme-react/diagram';

class App extends React.Component {
    constructor(props) {
        super(props);
        this.diagramRef = React.createRef();
        this.onSelectionChanged = this.onSelectionChanged.bind(this);
        this.onCustomCommand = this.onCustomCommand.bind(this);
    }
    onSelectionChanged(e) {
        // Displays the "showGrid" and "snapToGrid" commands when a user selects no items
        if (e.items.length === 0)
                e.component.option("contextMenu.commands", ["showGrid", "snapToGrid"]);
            else
                // Displays the "fontName", "fontSize", and "selectShapes" commands when a user selects a shape
                if (e.items[0].itemType === "shape")
                    e.component.option("contextMenu.commands", ["fontName", "fontSize", {name: "selectShapes", text: "Select All Shapes"}]);
                else
                    // Displays the "connectorLineStart", "connectorLineEnd", and "selectConnectors" commands when a user selects a connector
                    e.component.option("contextMenu.commands", ["connectorLineStart", "connectorLineEnd", {name: "selectConnectors", text: "Select All Connectors"}]);
    }
    onCustomCommand(e) {
        if (e.name == "selectShapes") {
            var shapes = e.component.getItems().filter(function(item) {
                return (item.itemType === "shape")
            });
            e.component.setSelectedItems(shapes);
        }
        if (e.name == "selectConnectors") {
            var connectors = e.component.getItems().filter(function(item) {
                return (item.itemType === "connector")
            });
            e.component.setSelectedItems(connectors);
        }
    }
    render() {
        return (
            <Diagram id="diagram" ref={this.diagramRef} onSelectionChanged={this.onSelectionChanged} onCustomCommand={this.onCustomCommand}>
            </Diagram>
        );
    }
}
export default App;
Specify a Command's Location on the Main Toolbar
Use the location property to set the location of a command or separator on the main toolbar. This property accepts one of the following values:
center
Places the command in the center of the main toolbar.before
Places the command before the central element(s).after
Places the command after the central element(s).
The Diagram UI component displays commands with the same location property value in the order in which you listed them. When the main toolbar cannot accommodate all commands, the component places excess commands in the overflow menu.
The example below demonstrates how to customize the main toolbar:
jQuery
$(function() {
    var diagram = $("#diagram").dxDiagram({
        mainToolbar: {
            visible: true,
            commands: [
                { name: "undo", location: "before" },
                { name: "redo", location: "before" },
                { name: "separator", location: "before" },
                { name: "copy", location: "center" },
                { name: "paste", location: "center" },
                { name: "cut", location: "center" },
                { name: "separator", location: "center" },
                { name: "clear", icon: "clearsquare", text: "Clear Diagram", location: "after" }
            ]
        },
        toolbox: {
            visibility: 'hidden',
        },
        historyToolbar: {
            visible: false
        },
        viewToolbar: {
            visible: false
        },
        onCustomCommand: function(e) {
            if(e.name === "clear") {
                var result = DevExpress.ui.dialog.confirm("Are you sure you want to clear the diagram? This action cannot be undone.", "Warning");
                result.done(
                    function(dialogResult) {
                        if(dialogResult) {
                            e.component.import("");
                        }
                    }
                );
            }
        }
    }).dxDiagram("instance");

    $.ajax({
        url: "data/diagram-flow.json",
        dataType: "text",
        success: function(data) {
            diagram.import(data);
        }
    });
});
Angular
<dx-diagram #diagram id="diagram" (onCustomCommand)="onCustomCommand($event)">
    <dxo-diagram-main-toolbar [visible]="true">
        <dxi-diagram-command name="undo" location="before"> </dxi-diagram-command>
        <dxi-diagram-command name="redo" location="before"> </dxi-diagram-command>
        <dxi-diagram-command name="separator" location="before"> </dxi-diagram-command>
        <dxi-diagram-command name="copy" location="center"> </dxi-diagram-command>
        <dxi-diagram-command name="paste" location="center"> </dxi-diagram-command>
        <dxi-diagram-command name="cut" location="center"> </dxi-diagram-command>
        <dxi-diagram-command name="separator" location="after"> </dxi-diagram-command>
        <dxi-diagram-command
            name="clear"
            icon="clearsquare"
            text="Clear Diagram"
            location="after">
        </dxi-diagram-command>
    </dxo-diagram-main-toolbar>
    <dxo-diagram-toolbox visibility="hidden"> </dxo-diagram-toolbox>
    <dxo-diagram-history-toolbar [visible]="false"> </dxo-diagram-history-toolbar>
    <dxo-diagram-view-toolbar [visible]="false"> </dxo-diagram-view-toolbar>
</dx-diagram>
import { NgModule, Component, ViewChild, enableProdMode, } from '@angular/core';
import { BrowserModule } from '@angular/platform-browser';
import { platformBrowserDynamic } from '@angular/platform-browser-dynamic';
import { HttpClient, HttpClientModule } from '@angular/common/http';
import { DxDiagramModule, DxDiagramComponent } from 'devextreme-angular';
import dialog from 'devextreme/ui/dialog';

@Component({
    selector: 'demo-app',
    templateUrl: 'app/app.component.html',
    styleUrls: ['app/app.component.css'],
    preserveWhitespaces: true,
})
export class AppComponent {
    @ViewChild(DxDiagramComponent, { static: false }) diagram: DxDiagramComponent;

    constructor(http: HttpClient) {
        http.get('data/diagram-flow.json').subscribe((data) => {
            this.diagram.instance.import(JSON.stringify(data));
        }, (err) => {
            throw 'Data Loading Error';
        });
    }

    onCustomCommand(e) {
        if (e.name === 'clear') {
            const result = dialog.confirm('Are you sure you want to clear the diagram? This action cannot be undone.', 'Warning');
            result.then(
                (dialogResult) => {
                    if (dialogResult) {
                        e.component.import('');
                    }
                },
            );
        }
    }
}

@NgModule({
    imports: [
        BrowserModule,
        HttpClientModule,
        DxDiagramModule,
    ],
    declarations: [AppComponent],
    bootstrap: [AppComponent],
})
export class AppModule { }

platformBrowserDynamic().bootstrapModule(AppModule);
Vue
<template>
    <DxDiagram
        id="diagram"
        ref="diagram"
        @custom-command="onCustomCommand"
    >
        <DxMainToolbar :visible="true">
            <DxCommand :name="'undo'" :location="'before'" />
            <DxCommand :name="'redo'" :location="'before'" />
            <DxCommand :name="'separator'" :location="'before'" />
            <DxCommand :name="'copy'" :location="'center'" />
            <DxCommand :name="'paste'" :location="'center'" />
            <DxCommand :name="'cut'" :location="'center'" />
            <DxCommand :name="'separator'" :location="'after'" />
            <DxCommand
                :name="'clear'"
                :icon="'clearsquare'"
                :text="'Clear Diagram'"
                :location="'after'"
            />
        </DxMainToolbar>
        <DxToolbox :visibility="'hidden'" />
        <DxHistoryToolbar :visible="false" />
        <DxViewToolbar :visible="false" />
    </DxDiagram>
</template>
<script>
import { DxDiagram, DxHistoryToolbar, DxViewToolbar, DxMainToolbar, DxCommand, DxToolbox } from 'devextreme-vue/diagram';
import { confirm } from 'devextreme/ui/dialog';
import 'whatwg-fetch';

export default {
    components: {
        DxDiagram, DxHistoryToolbar, DxViewToolbar, DxMainToolbar, DxCommand, DxToolbox
    },
    mounted() {
        var diagram = this.$refs['diagram'].instance;
        fetch('data/diagram-flow.json')
            .then(function(response) {
                return response.json();
            })
            .then(function(json) {
                diagram.import(JSON.stringify(json));
            })
            .catch(function() {
                throw 'Data Loading Error';
            });
    },
    methods: {
        onCustomCommand(e) {
            if(e.name === 'clear') {
                var result = confirm('Are you sure you want to clear the diagram? This action cannot be undone.', 'Warning');
                result.then(
                function(dialogResult) {
                    if(dialogResult) {
                    e.component.import('');
                    }
                }
                );
            }
        }
    }
};
</script>
React
import React from 'react';
import Diagram, { HistoryToolbar, ViewToolbar, MainToolbar, Command, Toolbox } from 'devextreme-react/diagram';
import { confirm } from 'devextreme/ui/dialog';
import 'whatwg-fetch';

class App extends React.Component {
    constructor(props) {
        super(props);
        this.diagramRef = React.createRef();
    }

    onCustomCommand(e) {
        if(e.name === 'clear') {
            var result = confirm('Are you sure you want to clear the diagram? This action cannot be undone.', 'Warning');
            result.then(
                function(dialogResult) {
                    if(dialogResult) {
                        e.component.import('');
                    }
                }
            );
        }
    }
    componentDidMount() {
        var diagram = this.diagramRef.current.instance();
        fetch('data/diagram-flow.json')
            .then(function(response) {
                return response.json();
            })
            .then(function(json) {
                diagram.import(JSON.stringify(json));
            })
            .catch(function() {
                throw 'Data Loading Error';
            });
    }
    render() {
        return (
            <Diagram id="diagram" ref={this.diagramRef} onCustomCommand={this.onCustomCommand}>
                <MainToolbar visible={true}>
                    <Command name="undo" location="before" />
                    <Command name="redo" location="before" />
                    <Command name="separator" location="before" />
                    <Command name="copy" location="center" />
                    <Command name="paste" location="center" />
                    <Command name="cut" location="center" />
                    <Command name="separator" location="after" />
                    <Command name="clear" icon="clearsquare" text="Clear Diagram" location="after" />
                </MainToolbar>
                <Toolbox visibility="hidden" />
                <HistoryToolbar visible={false} />
                <ViewToolbar visible={false} />
            </Diagram>
        );
    }
}
export default App;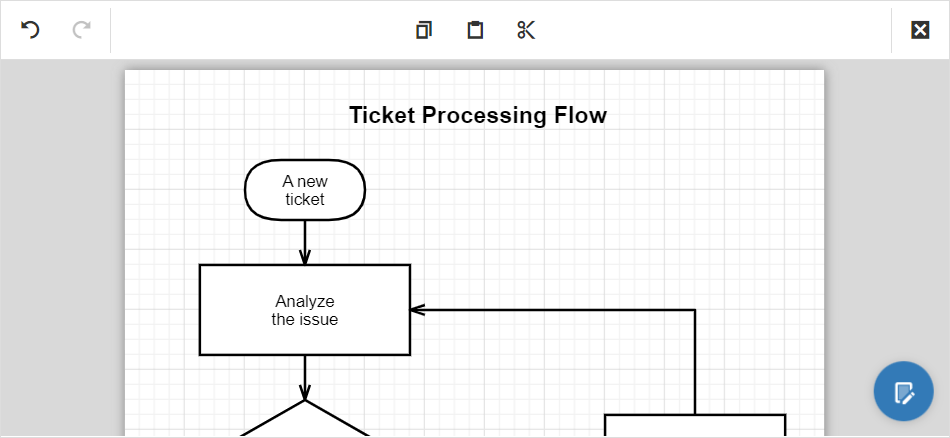

 Select one or more answers